
|
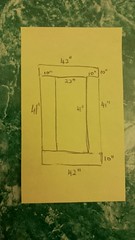
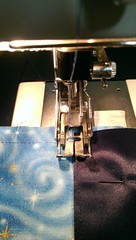
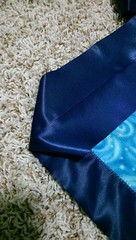
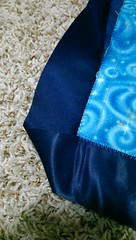
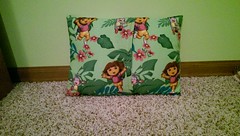
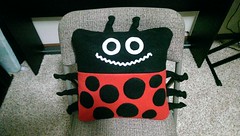
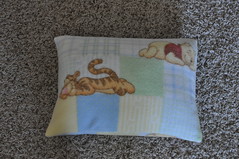
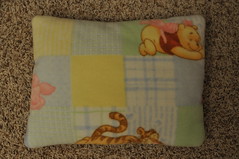
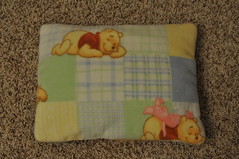
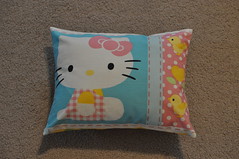
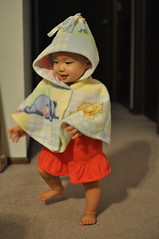
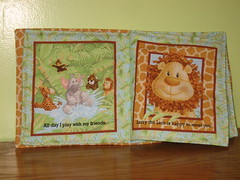
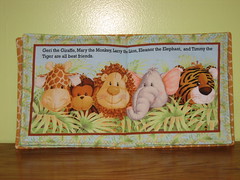
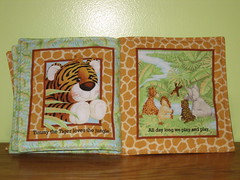
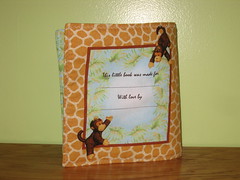
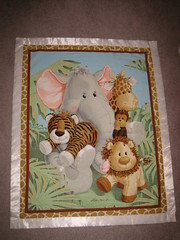
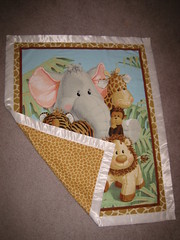
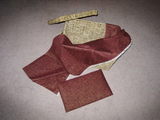
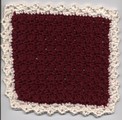
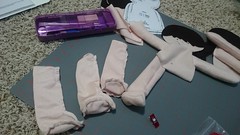
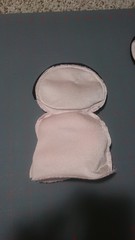
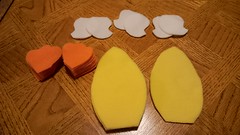
Title: Woodland Buddies Envelope Pillow Case
Date Started: 10/25/2025
Date Completed: 10/27/2025
Materials:
Woodland Buddies 100% Cotton Flannel by David Textiles 42/43" Wide ($13.61)
Comments:
One of Oliver's Monkey Pillowcase has a hole in it and so I made these as a replacement.
Pieces were cut following the same measurements as the Monkey Pillowcase.
For the hem of the openings of the pillows, I drew a 0.75" line and folded the end to the line and then folded it over again. 0.375" double-fold hem.
Used a stitch length of 2.5 and a stitch width of 3 when zigzagging the edges of the hems to prevent fraying.

|

|
| Front | Back |
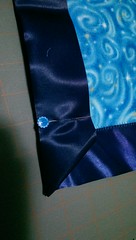
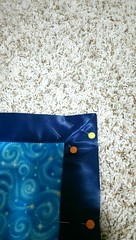
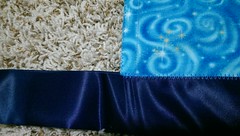
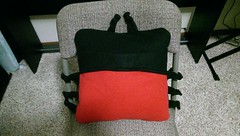
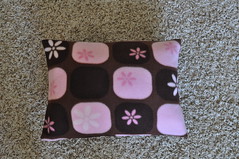
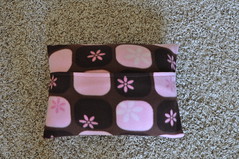
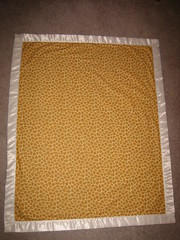
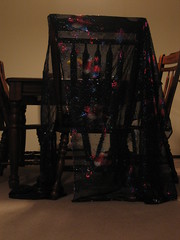
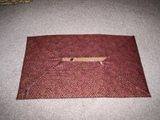
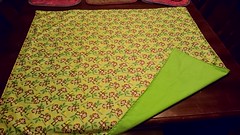
Title: Dear Stella Envelope Pillow Case
Date Started: 5/1/2025
Date Completed: 5/2/2025
Materials:
Leftover fabric Dear Stella Harvest Moon Hibernation Animals Black from Pleated Mask
Comments:
Matt wanted one of the pillow forms I had bought to replace Oliver's old pillows but didn't have a pilow case. So I made this for him.
Front piece: 19" x 15". Back 2 pieces: 19" x 10.75", with a 1/2" seam allowance and a 1/2" double-fold hem for the back pieces.

|

|
Title: Fleece Blankets
Date Started: 2/10/2025
Date Completed: 2/16/2025
Dimensions: 47" x 60"
Materials:
Happy Highlands - Happy Value Tie Blanket Kit ($6)
Teal Circles - Happy Value Tie Blanket Kit ($6)
Comments:
Donation to the Children's Hospital

|

|

|
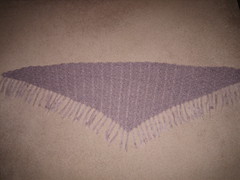
Title: Tendril Shawl
Date Started: 3/1/2024
Date Completed: 3/9/2024
Materials:
1 Cake Lion Brand Yarn Mandala Sequins Rose Quartz - 3.5 oz, 295 yards, Weight 3 ($3.50)
98% Acrylic, 2% Polyester
US Size J 6.0 mm crochet hook
Comments:
Saw this lovely asymmetrical shawl pattern, Tendril Shawl and thought it would work well as a shawlette.
Using only 1 Mandala cake, I stopped at 48 rows.

|

|

|

|
Title: Such Simple Shawl
Date Started: 2/15/2024
Date Completed: 2/25/2024
Materials:
2 Cakes Lion Brand Yarn Mandala Sequins Alexandrite - 3.5 oz, 295 yards, Weight 3 ($13.26)
98% Acrylic, 2% Polyester
US Size J 6.0 mm crochet hook
Comments:
Received the Mandala Sequins yarn in my Lion Brand Surprise Stash Bag and had been itching to try it out.
Thought maybe I would make a shawlette, and stumbled across this lovely pattern Such Simple Shawl.
After getting close to the end of the cake, I decided I wanted it bigger after all, and bought another cake off Amazon.

|
Title: Fleece Blankets
Date Started: 1/1/2024
Date Completed: 1/7/2024
Dimensions: 44" x 60"
Materials:
Cherries on Purple Make It Give It No Sew/Sew Throw Kit ($6.51)
Green & Blue Dinosaurs Make It Give It No Sew/Sew Throw Kit ($6.50)
Comments:
Donation to the Children's Hospital.

|
|
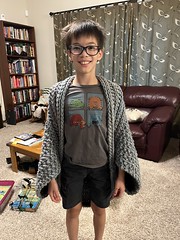
Title: Ollie's Cozy Blanket Cardigan
Date Started: 5/4/2023
Date Completed: 6/24/2023
Materials:
6 Skeins Lion Brand Yarn Wool-Ease Thick and Quick Storm Front- 5 oz, 87 yards, Weight 6 ($27.36)
80% Acrylic, 20% Wool
US Size N 10.0 mm crochet hook
Comments:
Ollie wanted his own blanket cardigan but just a tad smaller.
Used 67 chain stitches as opposed to 77 that I did for mine.

|
|
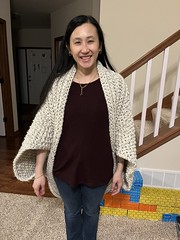
Title: Cozy Blanket Cardigan
Date Started: 3/16/2023
Date Completed: 4/23/2023
Materials:
7 Skeins Lion Brand Yarn Wool-Ease Thick and Quick Wheat Classic - 6 oz, 106 yards, Weight 6 ($38.30)
86% Acrylic, 10% Wool, 4% Rayon
US Size N 10.0 mm crochet hook
Comments:
Came across this easy crochet pattern Cozy Blanket Cardigan.
I love how it hangs and keeps me nice and warm. Ollie loves it too!

|
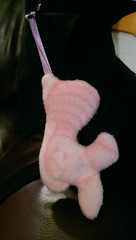
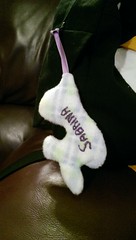
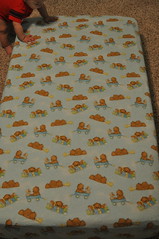
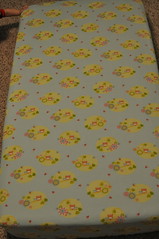
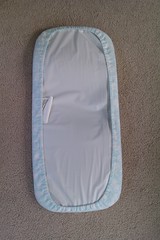
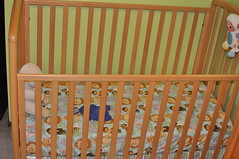
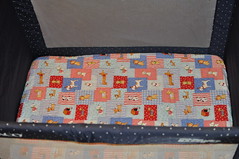
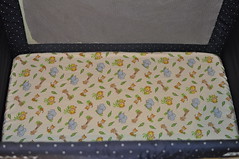
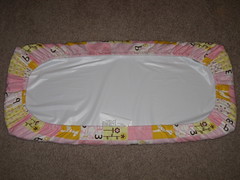
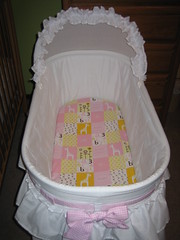
Title: NICU Lovies
Date Started: 3/4/2023
Date Completed: 3/4/2023
Materials:
Scrap Flannel from
Bassinet Fitted Sheets,
Monkey Pillow and
Fitted Crib Sheet.
Comments:
A friend's grandchildren arrived early and will need to spend some time in the NICU. Made these NICU lovies for them.
|

|

|
| Front | Back |
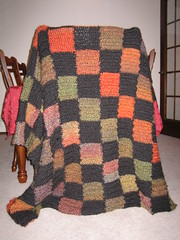
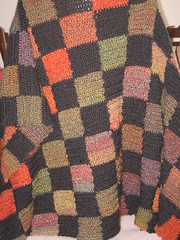
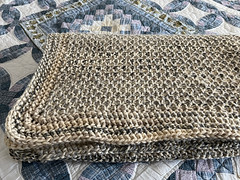
Title: Tunisian Crochet Blanket
Date Started: 1/13/2023
Date Completed: 2/26/2023
Dimensions: 56" x 71.5"
Materials:
21 Skeins Lion Brand Yarn Wool-Ease Thick and Quick Moonlight - 5 oz, 87 yards, Weight 6 ($95.76)
80% Acrylic, 20% Wool
12.0 mm "O" Tunisian Crochet Hook with 47" extension cord
Comments:
Got hit with the Crochet Bug and decided to finally figure out how to do Tunsian Crochet.
Decided to go with this pattern: Tunisian Crochet Honeycomb Stitch Blanket, with some modifications to make it bigger and add a border.
I went with this border pattern: Herringbone Crochet Border.
I did not single crochet all around the border as suggested, but only single crochet-ed the left hand side of the blanket as only that side didn't have a neat side to add the border to.

|
|

|
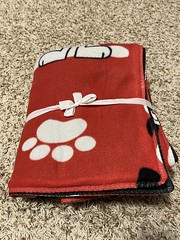
Title: Fleece Blankets
Date Started: 1/15/2023
Date Completed: 1/31/2023
Materials:
Space Make It Give It No Sew/Sew Throw Kit ($7.51)
Dog and Paws Make It Give It No Sew/Sew Throw Kit ($7.51)
Dino Make It Give It No Sew/Sew Throw Kit ($7.51)
Comments:
Sewed a few fleece blankets for donation to the Children's Hospital. Ollie actually received a blanket many years ago when he had to go there. Takes basically just a night to sew up one.
|
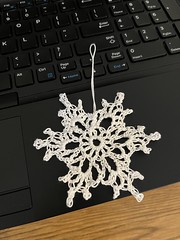
Title: Crochet Snowflake
Date Started: 12/13/2022
Date Completed: 12/13/2022
Crochet Hook: Size 5 (1.9 mm)
Pattern: Beautiful Crochet Stuff - 5 Free Crochet Snowflake Patterns
Yarn: 10 Cotton Crochet Thread
Comments:
Crocheted Snowflake #1. Fun little quick project.

|

|

|

|

|

|
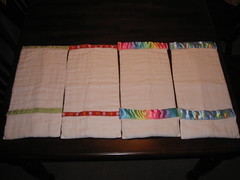
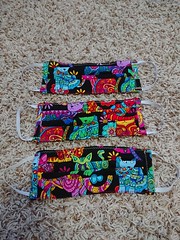
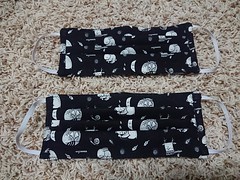
Title: Face Mask
Date Started: 10/7/2020
Date Completed: 10/7/2020 (for first mask)
Materials:
Fat Quarter - Brown Background, Flowers ($0.80)
1 yard long and 44 inches wide Paintbrush Studios Launch Party Monsters Blue ($9.25)
1 yard long and 44 inches wide Timeless Treasures Color Me Cat ($12.56)
1 yard long and 44 inches wide Kaufman Science Fair ($11.11)
1 yard long and 44 inches wide Kaufman Artisan Batiks Totally Tropical flowers Rainbow ($12.52)
Comments:
Decided to make a different style of face mask, to see which one I might like better. I also made it with elastic around the head as opposed to the ears, thinking it might be more comfortable for long-term use.
I used the pattern from Craft Passion - Face Mask Sewing Pattern.
Had to make new masks after a year for the Bean as she grew and needed a bigger size.
Mum: 25" elastic for around head
Dad: 9.5" elastic (2x) for ear loops
Kids: 21.5" elastic for around head

|
|
|

|

|
|
|

|

|
|

|
|
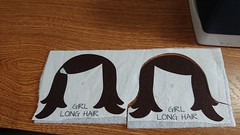
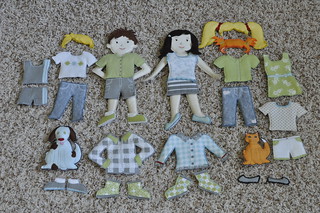
Title: Flats Doll
Date Started: 7/10/2015
Date Completed: 7/5/2020
Materials:
Flats - Angela Yosten - Moda Fabric ($18)
Soft n Crafty 100% Premium Polyester Fiberfill
1 Yard Pellon 987F Fusible Fleece ($4.97)
1" Wide Sew-On Velcro
Comments:
I had fond memories of playing with Paper Dolls as a kid and thought the Bean would enjoy them too. Except I decided to look for ideas for fabric dolls as they would be studier. Found the Flats Doll fabric and purchased it off Etsy. The seller very kindly included some Fusible Fleece.
I made the Cat and Dog first, by sewing the right sides together and turning it inside out and then filling it with fiberfill and top stitching it.
Somehow, I got busy and didn't get around to sewing the rest till 5 years later. :) This time I used the fusible fleece on the hair pieces, boy and girl. I put the rough side of the fusible fleece on the wrong side of the fabric and used a damp pressing cloth (lining material I had on hand) over the fleece side. The pressing cloth should be clear with no pattern, and cotton preferably, and slightly transparent, so you can see underneath. Parchment paper is placed on the ironing board and the fabric with fusible fleece is pressed with a hot iron (wool/cotton setting) 15 seconds on each area. After which, I cut out the pieces and top stitched the edges.

|

|

|

|
|

|
|
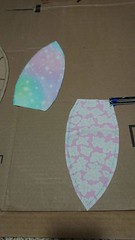
Title: Pleated Mask
Date Started: 4/3/2020
Date Completed: 4/4/2020 (for first mask)
Materials:
Quilt Block Quarters Canyon Sunrise Fabric - Mint Prism ($0.50)
Quilt Block Quarters - Coral Geometric ($0.50)
Fat Quarter - Blue Background, Monsters($0.80)
FC Misciano 3 Fat Quarter - Chevron ($0.97)
Leftover Fabric Timeless Treasures Color Me Cat from Face Mask
1 yard long and 44 inches wide Dear Stella Harvest Moon Hibernation Animals Black ($8.00)
1 yard long and 44 inches wide Timeless Treasures Coffee Break Mixed Coffees ($13.20)
Singer 70032 Braided Elastic, 8 yard by 1/4", White ($5.34)
Comments:
Made these pleated masks based on
DIY Face Mask Tutorial - Froedtert & Medical College of Wisconsin.
A few changes were made.
Steps:
- Cut 2 pieces of fabric to be used as binding for the sides of the mask.
Mum: 1.5" x 4"
Dad: 1.5 x 4.5"
Kids: 1.5 x 3" - Cut 2 pieces of fabric for the mask.
Mum: 7" x 9"
Dad: 7.5" x 9.5"
Kids: 6" x 8" - Put the 2 pieces of fabric (mask) right side together and stitch 1/4" around, leaving an opening to turn inside out.
- Optional: Add a wire (I used a plastic twist tie, bending the ends inwards a bit so it doesn't poke out for my mask) through the opening and center it at the top, sewing around the wire to hold it in place.
- Find the middle and shift 1/4" down to be the new "middle" of the mask.
- Place pins on the backside of the mask, bringing the top 2 pins together with the created flap behind and up. Repeat for the other pairs of pins to make the pleats. I just prefer this order for how the pleats lay against my face.
Diagram of order of pins, where o------- is a pin.
o---------
1"
o---------
1/2"
o---------
1/2"
- - - - - "middle" -- no pin, just showing where it is
1/2"
o---------
1/2"
o---------
1"
o---------For the kids size, the spacing is 3/4",1/2", 3/4", 1/2", 3/4".
- Measure binding pieces height against mask, folding the tops and bottoms down a little to fit mask.
- Then Place side binding piece right side down on side edge of mask and sew 1/4" from edge.
- Wrap binding to the other side and fold inwards enough to match the other side (usually 1/4" but may need to be adjusted based on thickness of fabric of mask) and pin in place. I used clips.
- Top stitch all around the edges of mask using a zig-zag stitch.
- Cut 2 pieces of elastic for ear loops. This will need to be measured for each individual for a good fit.
Mum: 5.5" elastic
Dad: 6.5" elastic
Kids: 5" elastic, eventually increased to 5.25" as they grew. - Sew elastic to sides of mask using a zig-zag stitch. Not the most elegant, but easy to rip out and replace the elastic as the kids grow.

|

|
| Front | Back |
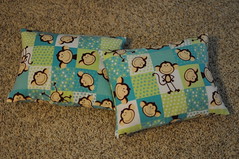
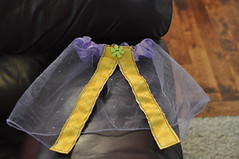
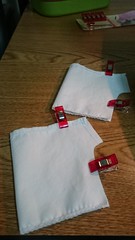
Title: Pirate Monkey Envelope Pillow Cases
Date Started: 2/29/2020
Date Completed: 3/2/2020
Materials:
1 yard long and 42 inches wide Captain Monkey & Friends Snuggle Flannel ($2.79)
Comments:
Oliver's Flannel Monkey pillowcases are starting to wear out. Made these to replace those. Front piece: 12.5" x 16.5". Back 2 pieces: 12.5" x 11", with a 1/2" double-fold hem.
|
|
|
|

|

|
|
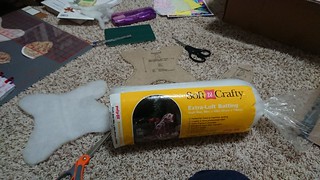
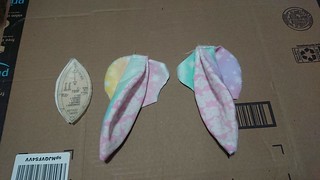
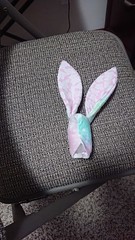
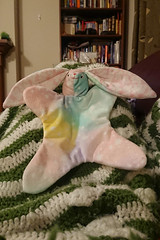
Title: Rainbow Bunny
Date Started: 11/16/2019
Date Completed: 11/23/2019
Materials:
Simplicity Pattern 1681 ($1.00)
White Flowers on Pink Cotton from Old Pyjamas
1 yard Soft and Comfy Fleece Fabric Stars on Pastel ($4.49)
Soft n Crafty Extra-Loft Batting Poly-fil
Soft n Crafty 100% Premium Polyester Fiberfill
Comments:
The Bean requested I sew her another soft bunny similar to her Blue Bunny as she fears that it will eventually wear out. I added Batting to the body which wasn't called for in the pattern, to give it some slight padding.

|

|

|
|

|
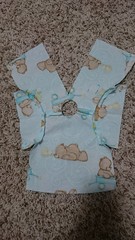
Title: Owie Dolls Reversible Dress
Date Started: 7/4/2018
Date Completed: 9/17/2018
Materials:
Light Blue Cotton from Owie Doll Kit
Fat Quarter - Black background, Green Balls/Ornaments ($0.97)
Leftover Red Craft Felt from Button Snake
Leftover Scrap from The Bean's Penguin Batik Shorts (Grandma sewed)
Ounona T5 Snap Button Plastic with Snaps Pliers and Organizer Storage Containers ($17.56)
Comments:
Took me waaay too long to get around to making a dress for the Owie Doll. Finally both dolls are dressed.

|
|

|

|
Title: Owie Dolls Reversible Shirt
Date Started: 7/9/2017
Date Completed: 8/20/2017
Materials:
Light Blue Cotton from Owie Doll Kit
Leftover Sweet Teddy Cotton from Crib Fitted Sheet
Leftover Red Craft Felt from Button Snake
Ounona T5 Snap Button Plastic with Snaps Pliers and Organizer Storage Containers ($17.56)
|
|

|
|

|
|
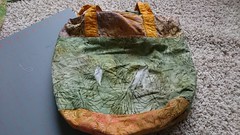
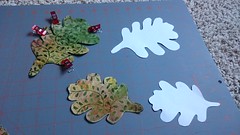
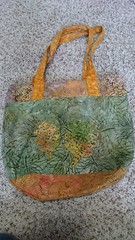
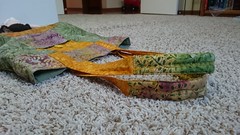
Title: Patched Bag
Date Started: 6/24/2017
Date Completed: 7/1/2017
Materials:
1/4 yard Legacy Studio Cotton Autumn Scroll Batik ($2.60)
Soft n Crafty Extra-Loft Batting Poly-fil
Soft n Crafty 100% Premium Polyester Fiberfill
Comments:
My SIL sewed this bag for me a couple years ago, and I have been using it regularly, and it shows. There were tears on the back side of the bag and the handles were fraying. My SIL gifted me with another lovely bag, but I still love this bag and decided to try patching it. I visited Joann's and found a batik fabric that I thought would go well with the colors in the bag.
I decided to make patches in the shape of oak leaves. I padded the leaves hoping it would protect the bag a little more from excessive rubbing that would induce another tear. I used a zig-zag stitch with stich length of 1.5 and stitch width of 3. I should have hand sewn the patch to retain the internal back pocket, but I was feeling lazy.
I patched the handles using 4" x 12" strips folded over the frayed parts and included batting to cushion it a bit.
|

|

|

|
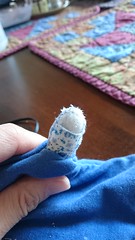
Title: Bunny Mending
Date Started: 5/2/2017
Date Completed: 5/12/2017
Materials:
Fat Quarter - White background, light blue flowers ($1.49)
Comments:
Bunny is special to The Bean and has been with her since she was 6 months old. She sleeps with it every night. Bunny is a gift from Auntie Jinsi in Belgium, so when she grew so attached to bunny, I requested extra bunnies if they could be found (a year later). Auntie Jinsi went back to the store and looked around, but alas, no bunnies, so as a last ditch effort she asked if the sales lady at the store if they still had the blue bunny doudou. The nice lady went up to the attic and found them! She bought 2 more and now The Bean owns 3 bunnies which makes it easy to wash and rotate them.
Over time, poor bunny has gotten a little worse for wear (might have had the paws chewed on). So, I took bunny with me on a trip to Jo-ann Fabrics and hunted for a suitable fabric to mend bunny's paws. I then traced each paw on the fabric and drew a 1/4"? line away from the traced outline. I added a little extra allowance on the bottom. Using a J-presser foot, I then proceeded to edge-stitch around it leaving the bottom open. Little mittens for the bunny!
Finally, I put the mittens over bunny's paws and ladder stitched them on. Voila! One repaired bunny, one more to go. The third bunny is miraculously still in okay shape and doesn't need to be mended yet...

|
|
|

|
|
|
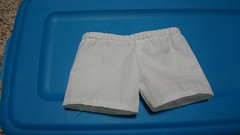
Title: Owie Doll Shorts
Date Started: 3/19/2017
Date Completed: 3/25/2017
Materials:
White Cotton from Owie Doll Kit
Comments:
First shorts that I sew and it's a pair of dolls shorts. I initially attempted to sew the shorts by sewing the crotch seam together first and then sewing the pant leg seams. The alignment doing it that way was off. Doing it according to instructions and sewing the pant legs seams first worked perfectly.
I don't have a serger so I did a zig-zag stitch instead using my J-presser foot. For future shorts, I should extend the waist a little higher so I can make a larger casing for the elastic. I'm not especially fond of sewing the elastic directly onto the fabric and stretching as I go a long, but prefer to slip it in using a safety pin and snake it through.

|
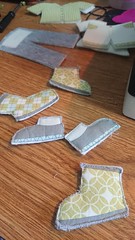
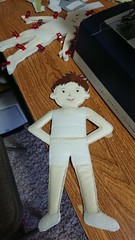
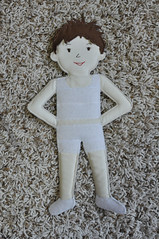
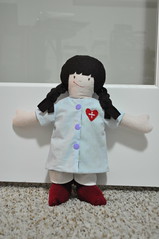
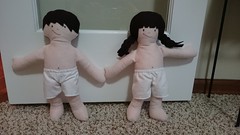
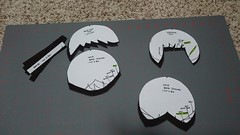
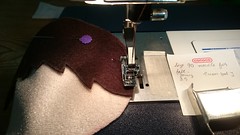
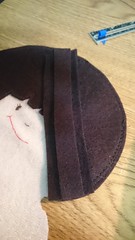
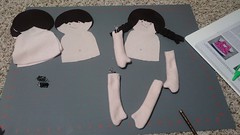
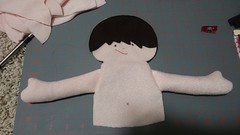
Title: Owie Dolls
Date Started: 12/13/2016
Date Completed: 3/16/2017
Materials:
Owie Doll Kit + Pattern - Fair Ski, Dark Brown & Dark Brown Hair ($47.99)
Comments:
Received the Owie Doll kit for Christmas 2015, and didn't get to it till almost a year later. Although I did print out the templates not long after I got the kit. I would work on in it a little bit at a time. I tried to take pictures everytime I did some work to keep track of my progress.
Things to remember:
- Use a size 90 needle when sewing on Felt. (I used a stitch length of 3.5)
- Use presser foot J when doing edge stitching. So much easier.
- Use the walking foot when sewing on velour as it is pretty slippery.
- Use funnel when filling doll with polybeads and over the mat. The beads are impossible to find when dropped into the carpet.
| 12/13/2016 - Cut out hair | ||
|
||
| 12/14/2016 - Cut out dolls, and sewed hair and embroidered faces | ||

|
|

|
| 12/15/2016 - Sewed on braids, sewed arms and stuffed one arm | |
|
|
| 1/6/2017 - Stuffed and sewed on arms | |

|
|
| 1/15/2017 - Sewed legs | 1/26/2017 - Sewed on back |
|
|
| 3/11/2017 - Sewed on bottoms | 3/16/2017 - Stuffed dolls |

|
|
|
|
| Cut Parts | Cut Parts |

|

|
| Eggs! | Chicks! |
Title: Reversible Chicks
Date Started: 3/24/2016
Date Completed: 3/27/2016
Materials:
Simplicity Pattern 1681 ($1.00)
1/4 yard Anti-Pill Fleece Fabric - Allison Bursts 59" Wide ($1.95)
1/2 yard Blizzard Fleece Fabric - Floral Dot Gray 59" Wide ($2.75)
1/2 yard Pale Yellow Blizzard Solid Fleece 58" Wide ($1.44)
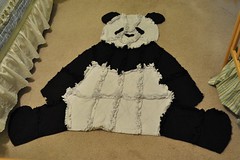
Black Blizzard Fleece Scraps from Panda Throw project
Stolen bits of Tangerine Blizzard Solid Fleece (intended for other future project)
Comments:
I thought this pattern was adorable to make as Easter presents for the kiddos. I had actually cut out enough for 4 chicks but only had enough time to stay up late and rush to finish 2. I did eventually finish #3, in time to give a friend's daughter when I met up with her in Paris in April 2016. The last chick was only finished in early 2017? I'm a horrible procrastinator.
|
|
Title: Art Drop Cloth
Date Started: February? 2016
Date Completed: February? 2016
Dimensions: 30.5" x 34.5".
Materials:
1 yard Babyville Boutique Playful Friends Monkeys PUL 64" Wide ($6.00)
1 yard Jasmine Green Cozy Flannel 42" Wide ($2.62)
Comments:
I had been using old newspaper set on the table for when The Bean wanted to paint, and I thought it would be nice to have an art drop cloth. The PUL fabric I thought would be perfect as split paint wouldn't soak through into the wood. I chose a flannel backing theorizing that the drop cloth won't slip and slide as much.
|
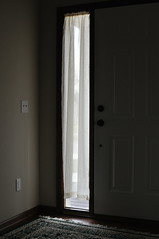
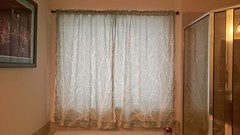
Title: Bathroom Curtains
Date Started: June? 2015
Date Completed: July ? 2015
Materials:
2 Sea Green - Better Homes and Gardens Arbor Springs Semi-Sheer Window Panel 40" x 84" per panel ($27.94)
3.5 yards Cream Silkessence 41" Wide ($10.74)
Comments:
Wish I had taken better notes of this project. As it is I only know that I bought both fabrics in June. Not exactly sure when I finished before I got around to taking a picture (after the curtain rod was finally installed). At any rate, I was looking for blackout curtains for Ollie's room and came across these curtains. I really loved them, so I bought them, cut them to size and added the silkessence fabric as a backing material to make the curtains not quite so sheer, yet still allow a fair amount of light through. I also might not have needed quite so much yardage of the silkessence. I think 3 yards should have been enough. Don't quite remember and don't feel like digging through stash to figure out how much is left.